 Success stories of how Tungaloy’s sales representatives have worked closely with customers towards machining success.
A Breakthrough with Tool Setup outside the Machine for Swiss Lathe Significantly Improves Productivity
Featured companySuzuki Manufacturing Co., Ltd.

Salesperson
Kazuki Ishiguro
- Country
- Japan
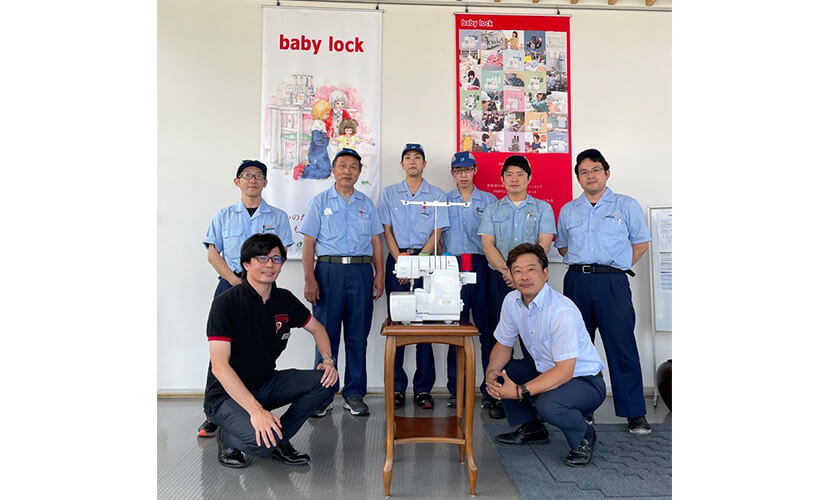
This is a story of a customer who faced challenges in setting up tools within the confined space of a Swiss lathe and how an external tool setup brought success to its business. Suzuki Manufacturing Co., Ltd., based in Yamagata Prefecture, Japan, is known for its household sergers and horizontal pillow packaging machines.
In 1968, they produced the world’s first compact serger, called “Babylock,” for craftsmen and household. With customer-focused business strategies, the company continuously improved their products and expanded their market share. Leveraging on their accumulated know-how, they started developing and selling pillow packaging machines in 1977. Today, the company contributes to various industry sectors, including food, medical, and agriculture, with their unique technology and high-performing products. Suzuki Manufacturing Co., Ltd.’s corporate goal is to expand its business around the world as a “Yamagata Brand” with focus on continuous development.
Contents
- A long-standing relationship
- The barrier in improving efficiency with Swiss lathe
- Searching for a solution to overcome the problem
- Potential of tool setup outside the machine
- Establishment of the process to measure cutting edge position and to make corrections
- Successful reduction in the tool setup time
- Moving towards further improvements
A long-standing relationship
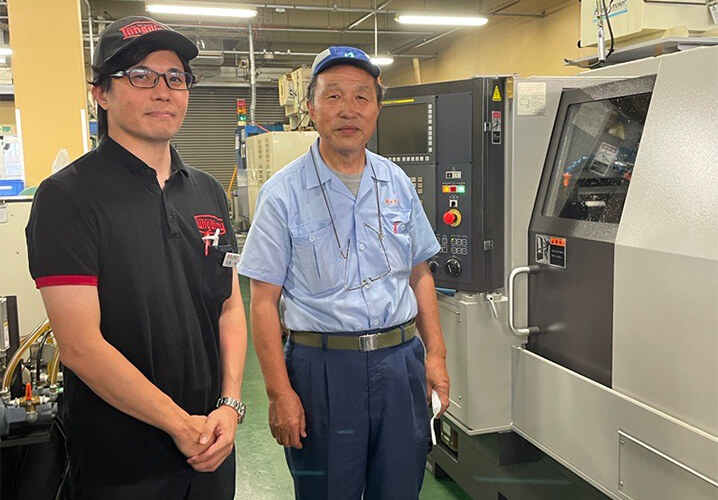
Mr. Ishiguro, a Tungaloy sales representative, and Mr. Matsuda, the plant manager of Suzuki Manufacturing Co., Ltd., first met each other in 2018 when Mr. Ishiguro visited the company with a dealer, Taruishi, to introduce himself. Mr. Matsuda has maintained a long-standing relationship with Tungaloy, and Mr. Ishiguro is actually the fifth sales representative assigned to Suzuki Manufacturing Co., Ltd.
Over the years, their relationship has become stronger through regular visits, seminars, and exhibitions; their collaboration has expanded beyond simple product sales to include testing prototype cutting tools on the company’s machines.
The barrier in improving efficiency with Swiss lathe
At Suzuki Manufacturing Co., Ltd., small parts used in their main product, sewing machines, are produced in-house with Swiss lathes. With Swiss lathes, increasing machine utilization is crucial to boosting productivity. However, the numerous steps and the long time required for insert replacements and tool setup changes prevented the company from improving their machine utilization rates.

“We had to change inserts and set up tools inside the machine. It took time and required precision, so this task was especially challenging for the new machine operators. Improving the tool replacement process in our Swiss lathe line had long been a major challenge for us.”
Steps required to replace inserts and set up tools
To change the insert corner:
- The operator replaces the insert inside the machine.
- With the holder still attached to the tool post, the operator loosens the screw and removes the insert.
- The operator changes the corner and tightens the screw.
To change the insert and the tool:
- The operator removes the tool holder from the tool post.
- The tool holder is taken out of the machine, and the operator changes the insert outside.
- The operator corrects the position of the tool tip using the below method.
Method used to correct the position of the tool tip
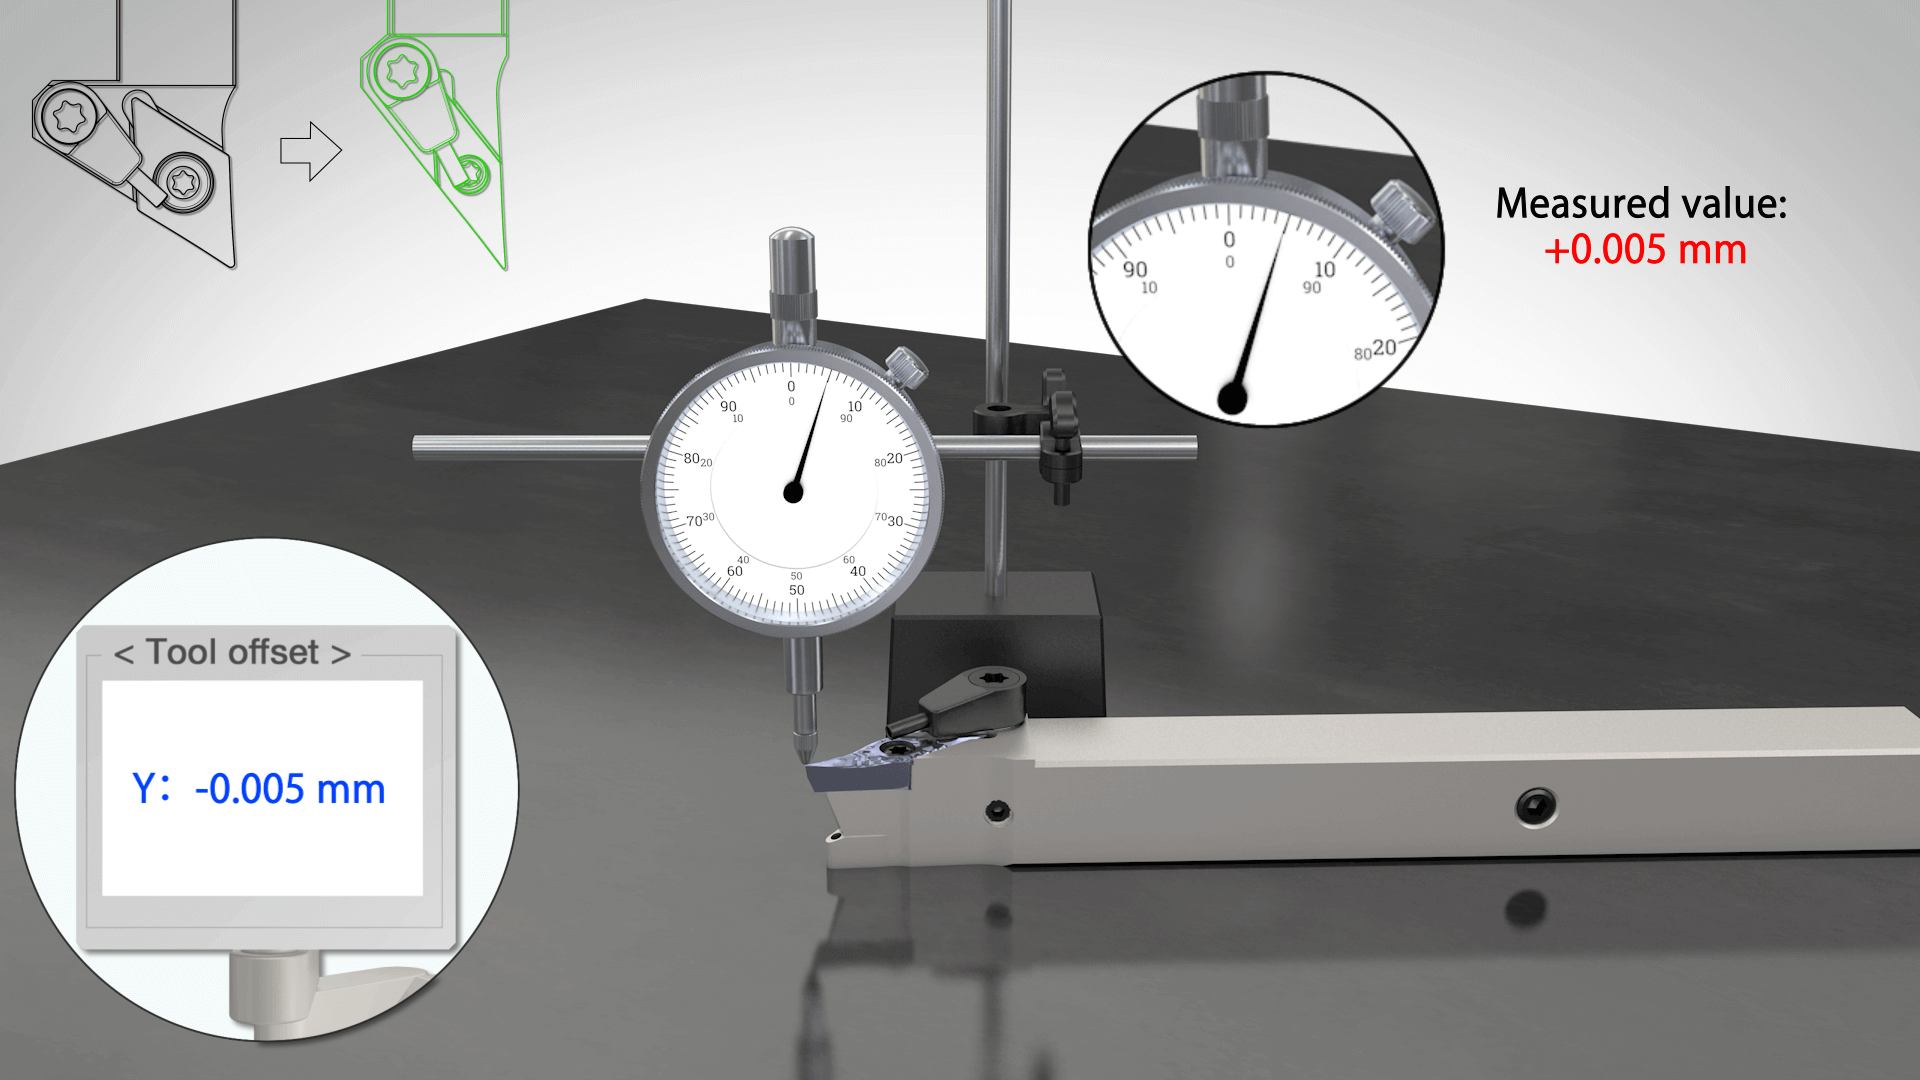
1. Adjust the edge height (Y-axis)
- Place the reference height sample on the machine bed and set the dial gauge to zero.
- Measure the tool tip position of the new tool with the dial gauge.
- Input the difference in the measurement as the tool offset correction in the Y-axis.
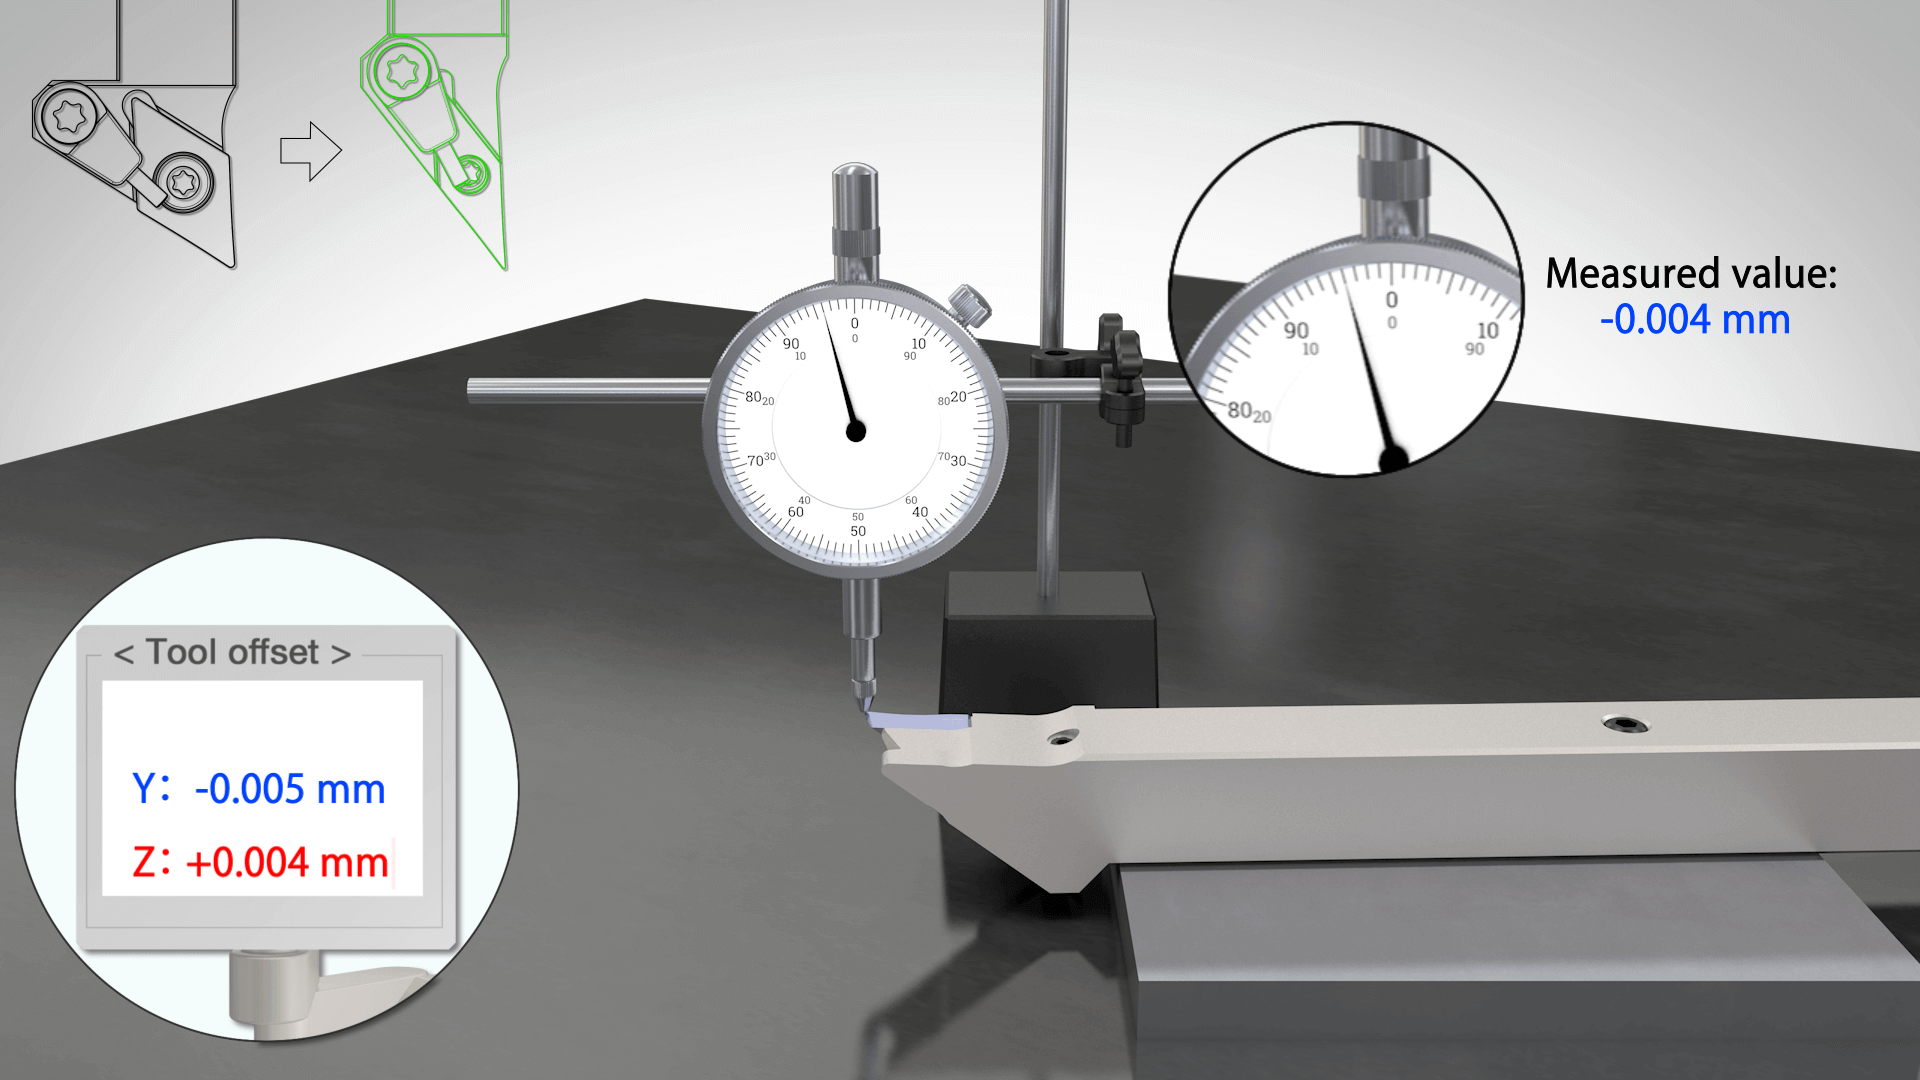
2. Adjust the longitudinal measurement of the workpiece (Z-axis)
- Place the reference height sample on the machine bed and set the dial gauge to zero.
- Measure the tool tip position of the new tool with the dial gauge.
- Input the difference in the measurement as the tool offset correction in the Z-axis.
3. Adjust the diameter (X-axis)
- Place the new tool on the tool post.
- Extend the bar from the bush and make the cutting edge contact its outer diameter.
- While the cutting edge is in contact, tighten and secure the tool using a fixing bolt.
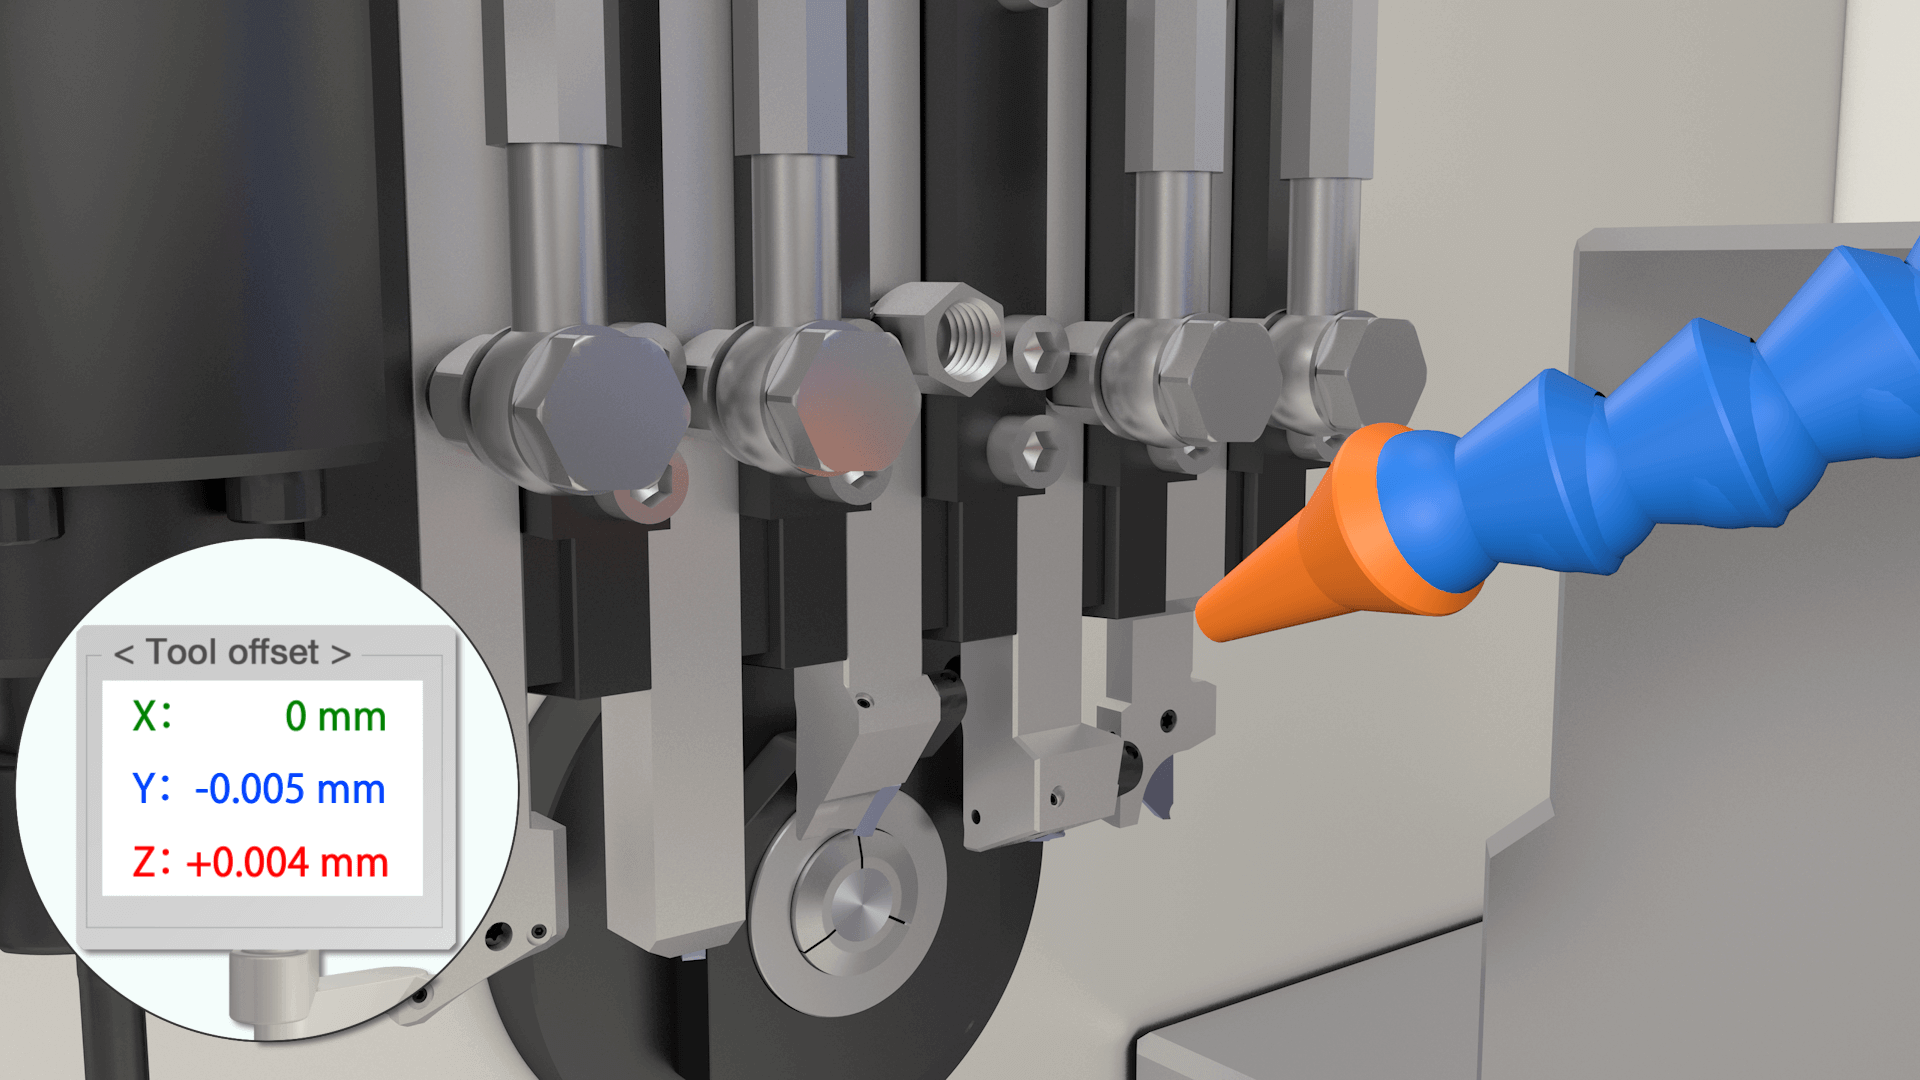

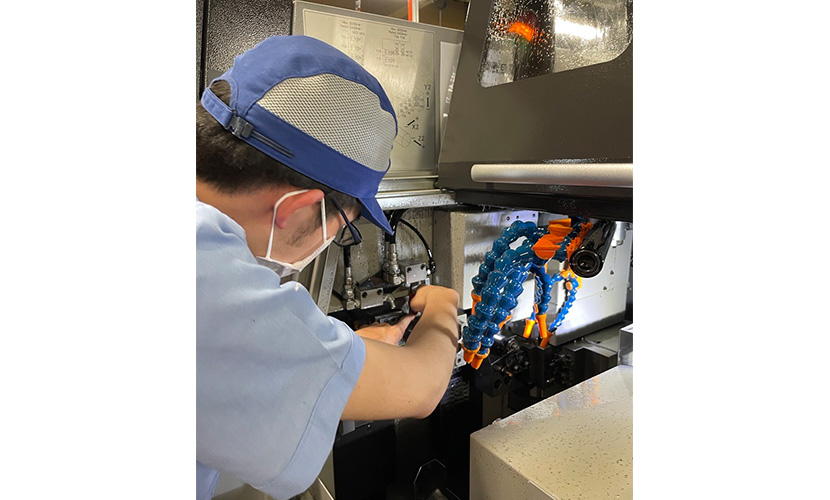
“Changing inserts and setting up tools involved many steps, and we needed to be careful not to make any mistake. The limited space inside the Swiss lathe made even simple tasks, like changing inserts or holders, challenging. The compact tool post and the limited space between adjacent tools and near the bush also made the process more complicated. As a result, operators often dropped inserts and screws inside the machine. It was time consuming to look for them, and we never found some of them. As you can see, we were wasting our time and money. This issue had long been a significant problem for us.”
Operators needed to change inserts and tools in a confined space inside the machine.
Searching for a solution to overcome the problem
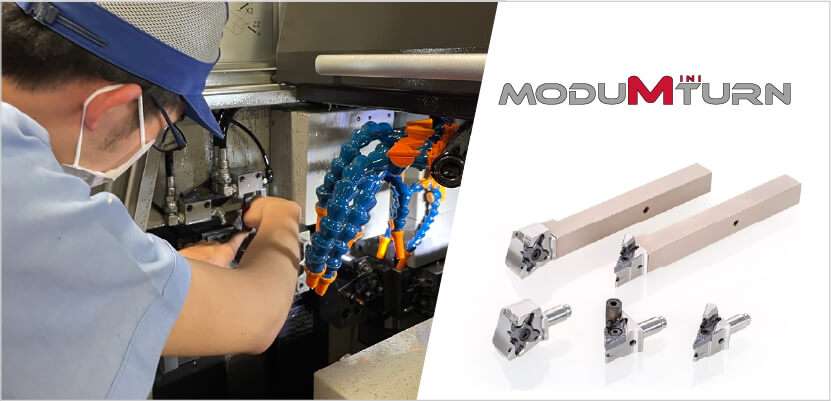
Mr. Ishiguro, Tungaloy sales representative, looked for a solution for the challenge Suzuki Manufacturing Co., Ltd. faced. This is when the new product ModuMini-Turn, designed for Swiss lathes, was launched to the market. The head-exchangeable tool offers excellent operability and machining precision. It allows the operator to change inserts while the shank remains installed on the tool post. Its unique coupling mechanism ensures that the head is securely clamped, enabling high precision in tool tip positioning.
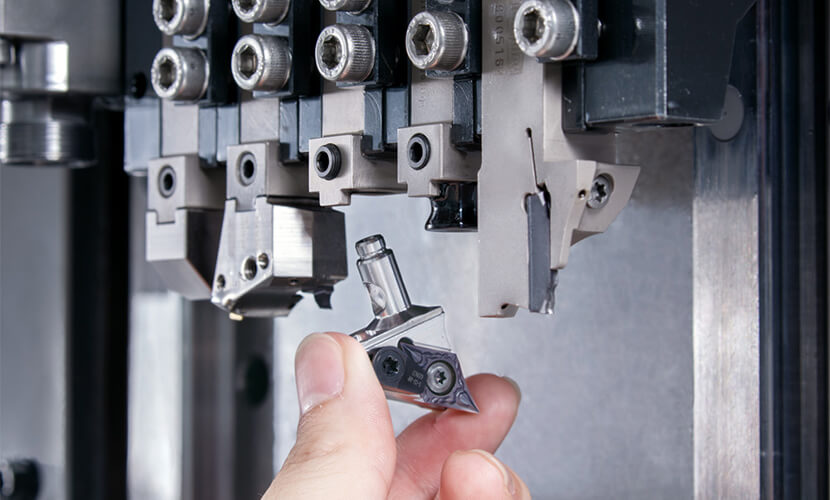

“I had a hunch that ModuMini-Turn will solve the challenges of tool exchange in Swiss lathes. It was launched to the market in September 2021, and I immediately introduced it to Suzuki Manufacturing Co., Ltd.”

“When I heard about this tool from Mr. Ishiguro, I also had a feeling that it will solve our problem. To take advantage of the product’s characteristics, we thought the best approach would be to change inserts outside the machine and quickly switch tools without measuring or adjusting the tool tip position.”
Potential of tool setup outside the machine
Mr. Matsuda believed that this idea could potentially solve their bottlenecks and proceeded to test the product. The initial plan was as follows:
- Remove the head from the shank inside the machine (while keeping the shank attached to the tool post).
- Prepare the replacement head with an insert already installed outside the machine.
- Attach this replacement head to the shank inside the machine and proceed with the machining process.

“My main concern with this operation was the precision of the tool tip position (center height, diameter, and longitudinal direction of the workpiece). We prepared several combinations of ModuMini-Turn shanks and heads and measured the variability in tool tip precision. Unfortunately, the variations did not fall within the required precision range, especially with M-class inserts used in press molding, which showed more than 0.1 mm in variance. We reluctantly gave up on this method.”
Even though their initial plan didn’t work out, the ease of head exchange and the potential of changing inserts outside the machine seemed appealing to the company. Mr. Matsuda says, “We wanted to somehow find a way to setup tools outside the machine with ModuMini-Turn.” To achieve this goal, Mr. Matsuda appointed Mr. Tasaki from the production department to be in charge of the project.
Establishment of the process to measure cutting edge position and to make corrections

“I was certain that our productivity will improve significantly if we can establish a way to set up tools outside the machine as well as measure and correct tool tip positions. Besides minor troubles like dropping inserts and screws inside the machine, tools may be improperly mounted at an angle, which leads to machining defective parts. We also had instances where tools ran into workpiece material or bush because of the wrong values entered for the tool offset correction. These issues could cause significant delays in the production schedule due to time required for re-checking precision. To prevent such major troubles from happening, I was committed to finding a solution to our tool setup processes.”
After much analysis and tests, Mr. Tasaki finally finds the right path.
Method used to correct the position of the tool tip outside the machine using special jigs and master shank/master head
To change the insert corner:
- Prepare a dedicated measuring jig.
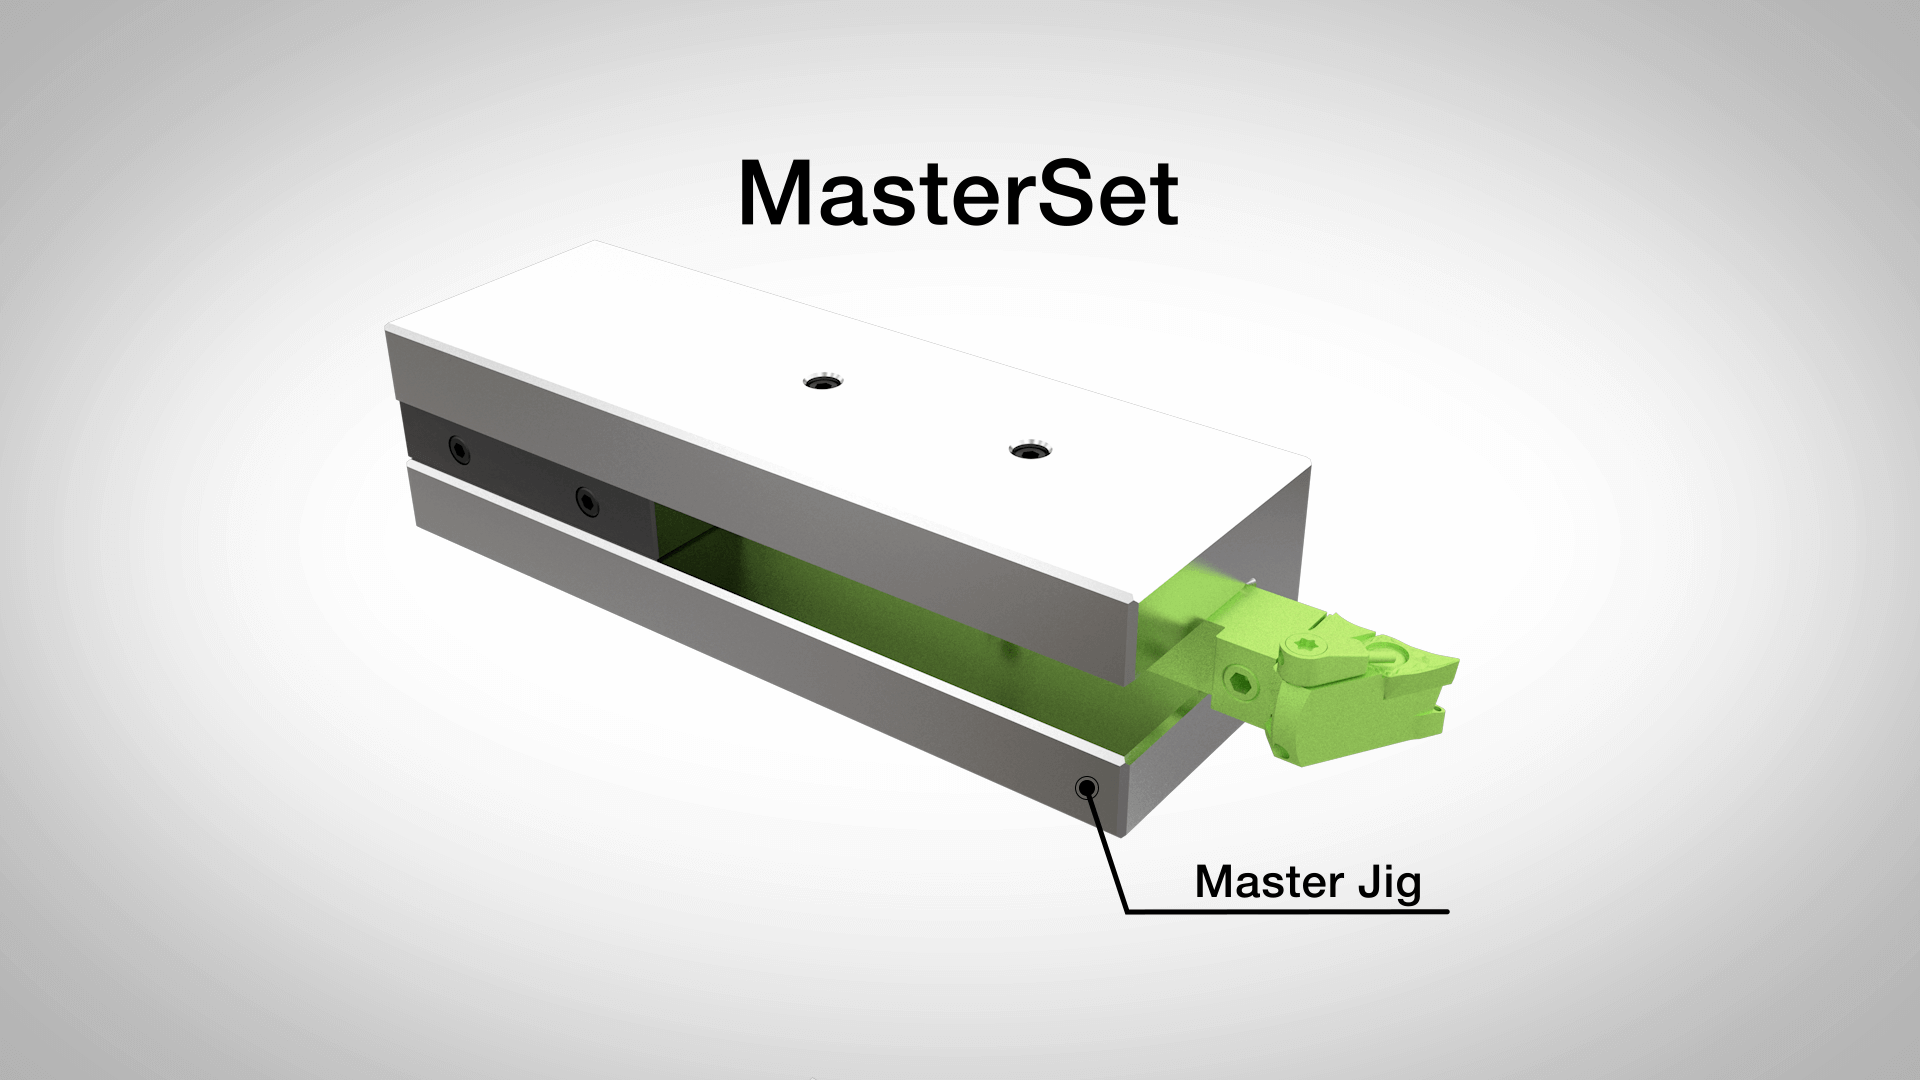
- Define a master shank and head to serve as the standard for measurement and use them as references for input corrections.
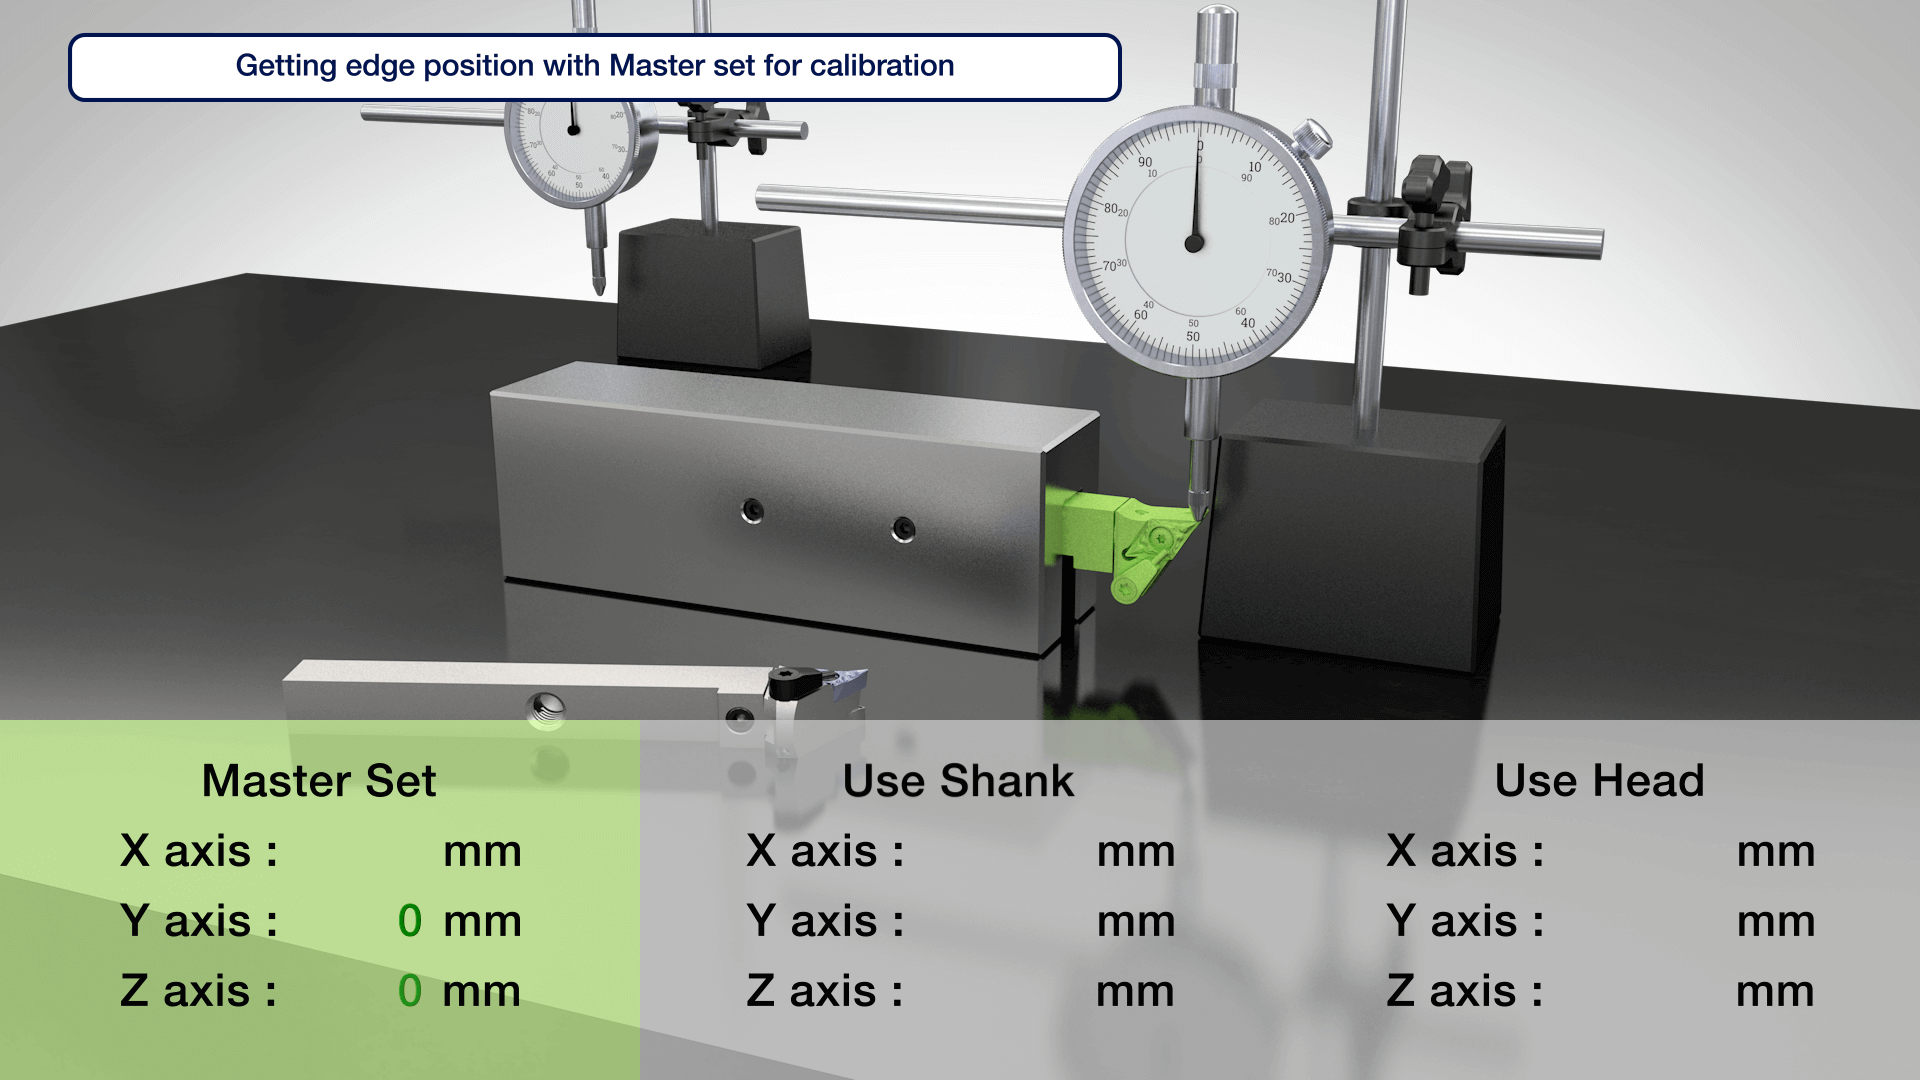
To correct the tool tip position (X-, Y-, and Z-axis):
- Attach the master head to the shank that will be installed in the machine. Then, measure the differences in the center height (Y-axis), diameter (X-axis), and the longitudinal direction of the workpiece (Z-axis) for each shank to be used in comparison to the values of the combination of the master shank and head.
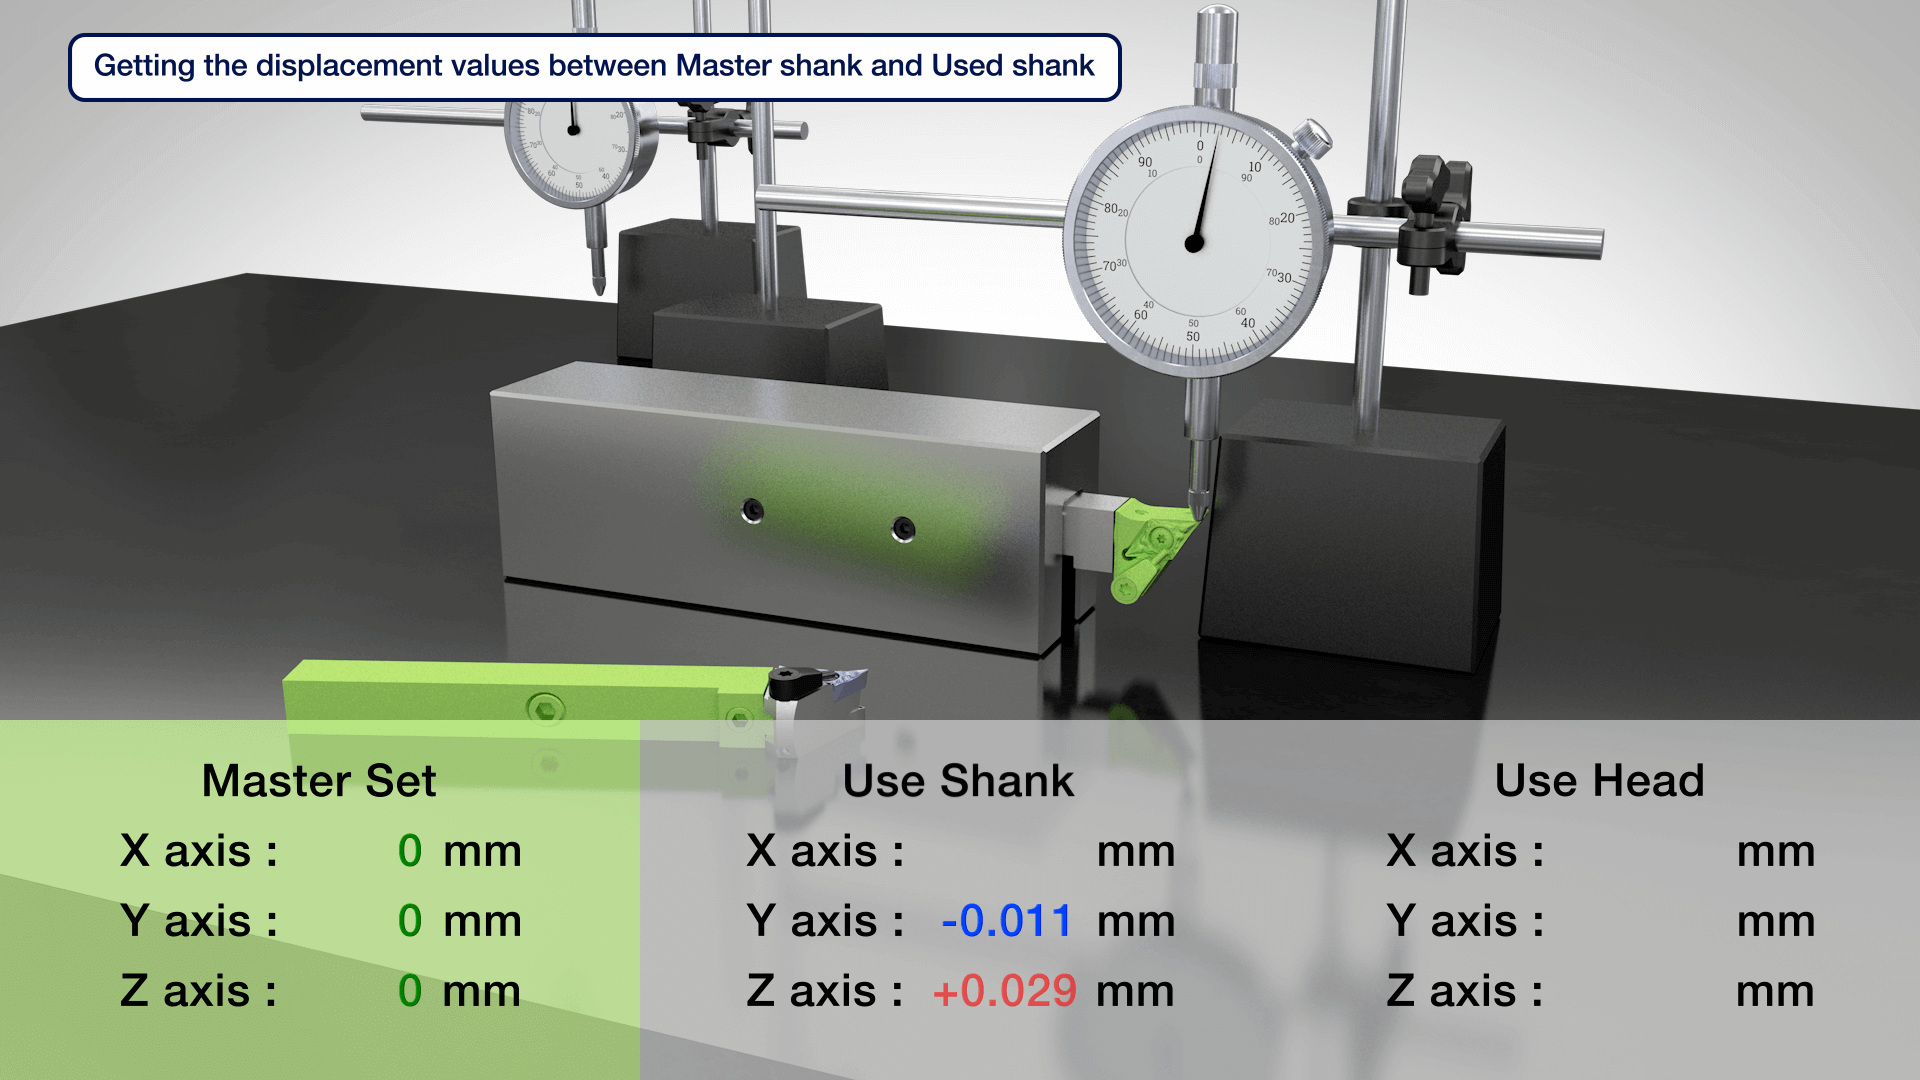
- After the measurement, install the shank inside the machine.
- Attach the insert to the head that will be used inside the machine, and then mount this head on the measuring jig.
- With this setting, measure the center height, diameter, and longitudinal position along the workpiece direction.
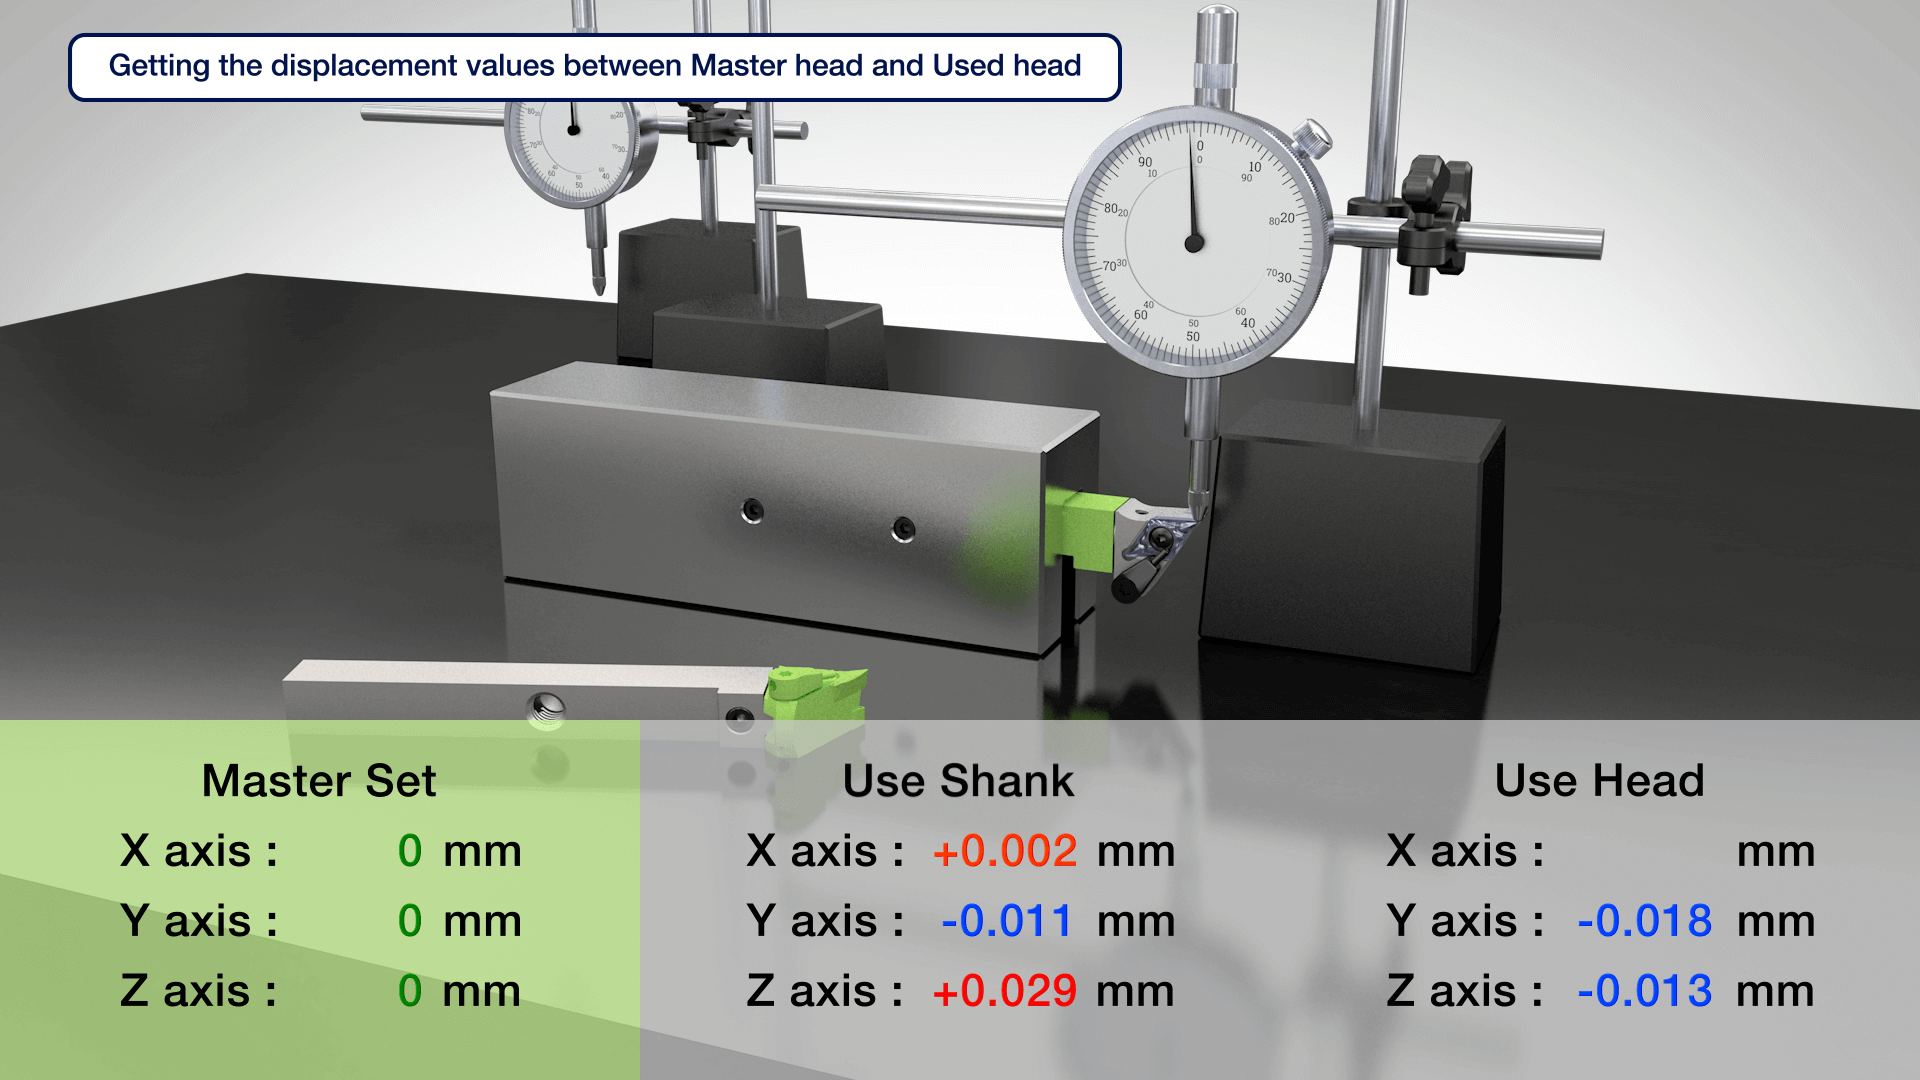
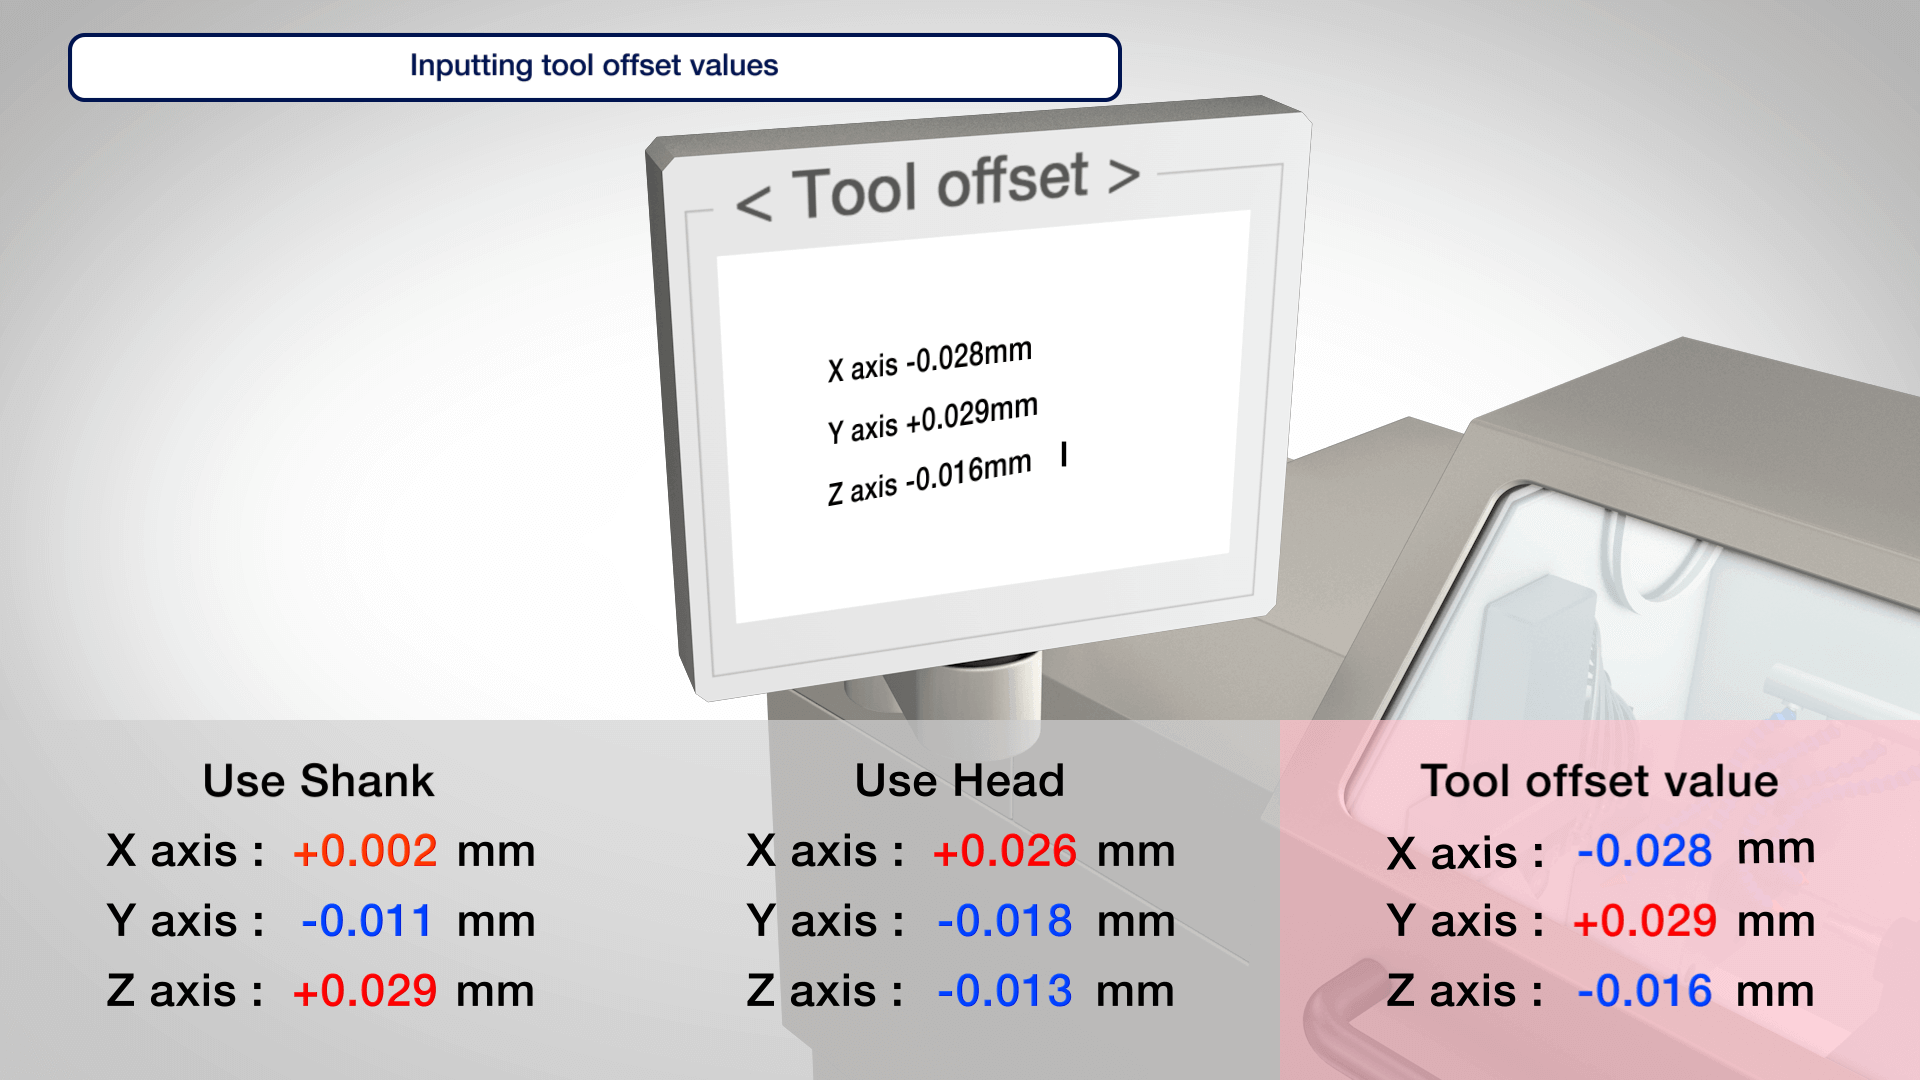
- By adding the measured values and the differences from the master shank, you can calculate the final corrective values to input for the tool offset.
Successful reduction in the tool setup time
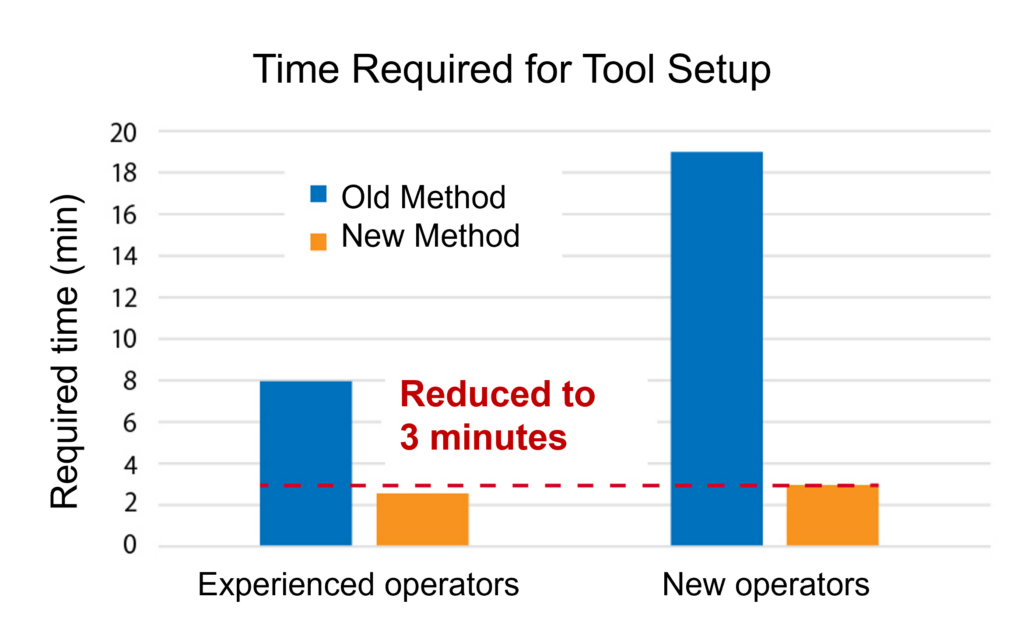
After implementing the new process, the time operator spent on insert changes and tool setups decreased dramatically. The process that took an experienced operator 8 minutes to complete reduced to 2.7 minutes. The change was even more impressive for the new operators, who spent 19 minutes to do the job using the old steps. The new process took them only 3 minutes, which was very similar to the time required for the experienced operators. The establishment of the new tool change process not only reduced the changeover time but also helped all operators successfully perform the job regardless of their skills.

“I had always been worried that it took me much longer to change tools than my senior colleagues. If I tried to do it faster, then I was more likely to make mistakes. The biggest challenge was balancing the time efficiency with the precision of the work, and the new method allowed me to complete the tasks quickly and accurately. It also freed up some of my time to do other work and improved my overall work efficiency and accuracy.”

“The reduction in the tool exchange time and the standardization of the process significantly contributed to the overall productivity of the production line. The new operational method eliminates the need to move the tool post during tool changes, which helps prevent contact issues since the next movement will be for machining. Without a doubt, the reduction of the potential troubles has led to more stable line operation and reduced my headache as the production line manager.”
Key Improvements
-
Increased Machine Utilization Due to Reduced Tool Exchange Time
The tool exchange time which previously took 10-20 minutes decreased to approximately 3 minutes, contributing to improved machine utilization.
-
Standardization of Work Procedures for All Operators
With the old process, there was a significant difference in time to complete the job between the experienced workers and the new operators. With the change to external tool setup using ModuMini-Turn, the process was standardized, and the required time became indifferent regardless of the skill level of the employees.
-
Reduced the Risk of Making Mistakes and Major Troubles, Contributing to Stable Line Operation
External setup minimized machine operation during tool exchange, reducing critical errors, such as contact accidents caused by entering the wrong tool offset values. This helped the company run their production lines without disruption.
Moving towards further improvements
Mr. Matsuda, the plant manager, also feels that the results of this improvement brought significant changes to the company.

“The reduction in the tool exchange time, the standardization of the work procedures, and the prevention of troubles are all very important improvements for the factory. I would like to request Tungaloy to develop tools that can perform operation without needing to adjust the tool tip position. As a fellow manufacturer, I understand that it’s challenging, but this was my initial goal and would further help our production processes. In the world of manufacturing, continuous improvement is always required. We won’t be satisfied with just this improvement; we aim to further automate our operations to increase our productivity. With automation comes the need for better performing tools, like products with stable chip disposal for trouble-free operations and extended tool life for increased operation rates.”

“I proposed ModuMini-Turn to Suzuki Manufacturing Co., Lt., but they taught me how the product could be used beyond our expectations. Their strategy was eye-opening even for our engineers at Tungaloy. Cutting tool manufacturers often learn important lessons and find new ideas through endusers, and I’m grateful I was able to work with Suzuki Manufacturing Co., Ltd. on this project. The experience reinforced the importance of listening to our endusers’ feedback, sharing them with our engineers, and applying them to our product developments. I want to continue working closely with my customers and make sure their voices are heard in Tungaloy.”
At Tungaloy, all members are committed to developing and delivering innovative cutting tools that help our customers improve their productivity.
Featured Product
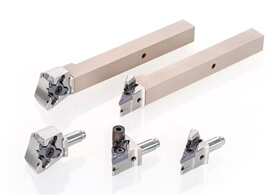
Modular head turning toolholder system for Swiss machines
ModuMini-Turn
Significantly reduces machine downtime caused by changing tools and setups
